What To Discard Tuesdays - Week 3
Click HERE for the original questions and more quizzes on Mahjong Tutorial.
*Translations of the original quizzes start below*
*M=Manzu/Character, P=Pinzu/Circles, S=Souzu/Bamboo*
*Note that the questions are random, and you may see the same ones periodically*
*Rules: Full Hanchan. 25000 Point Start and 30000 Return. Uma is 10-30
One Red 5 in Manzu, Pinzu and Souzu respectively.
Any other rule that needs to be considered will be mentioned in the quizzes*
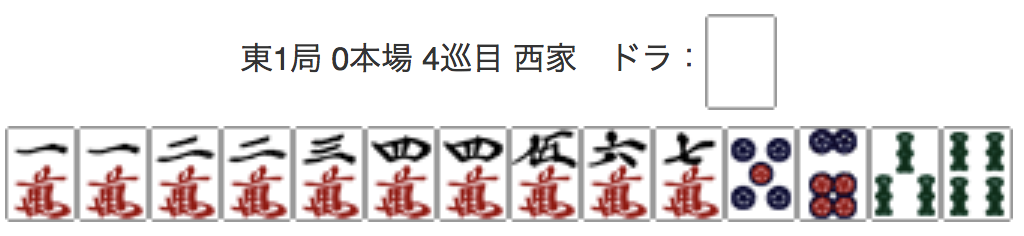
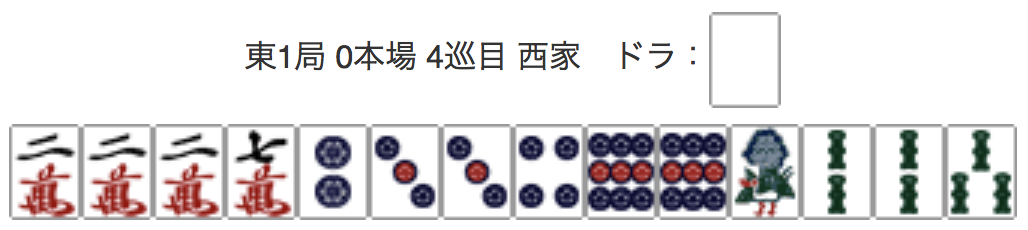
Q1.
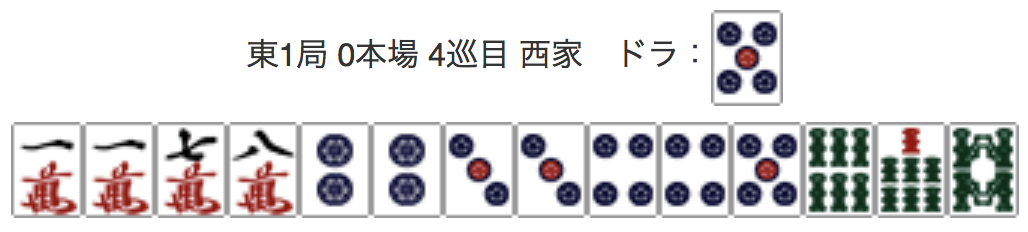
East 1, 0 Honba, 4th Turn, Seat Wind: West, Dora: 5P
A1.
2P is the correct answer. Although the final points will be the same regardless of discarding 2P or 5P, there is the risk that some one will call the Dora. If you have a choice, it will be better to discard the tile that is not the Dora.
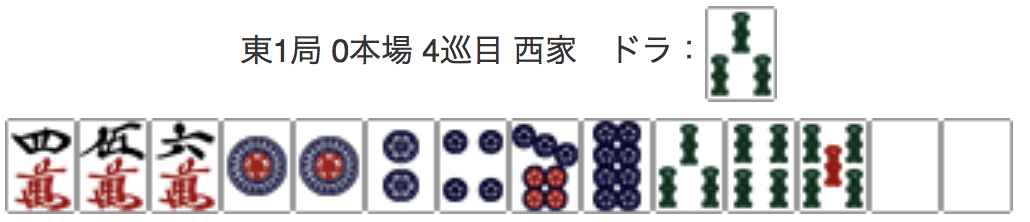
Q2.
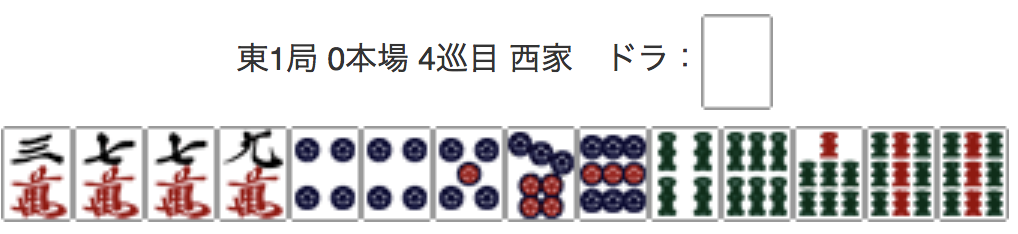
East 1, 0 Honba, 4th Turn, Seat Wind: West, Dora: Haku
A2.
4S is the correct answer. Think of the Souzu/Bamboo shape as 4 + 67 + 99. The 467 shape will make 4S an unessasary tile, making 4S discard the correct answer.
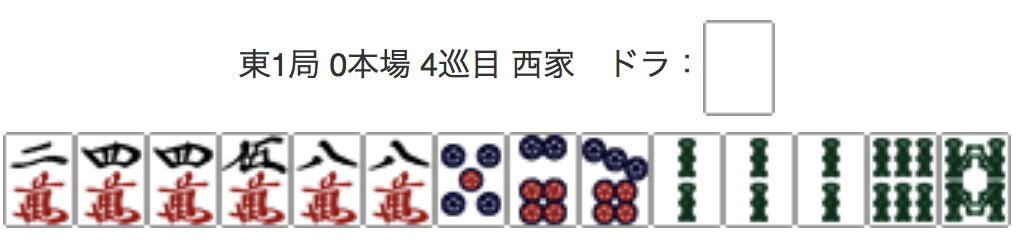
Q3.
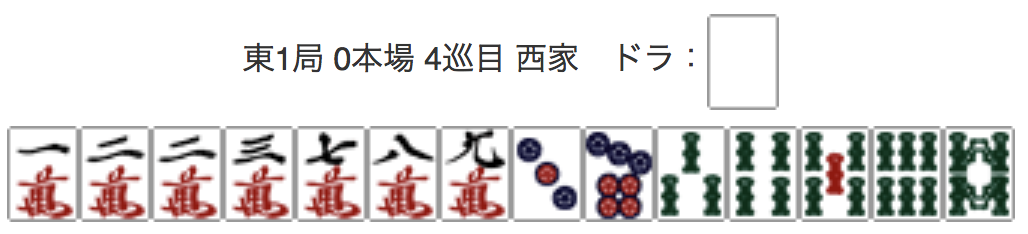
East 1, 0 Honba, 4th Turn, Seat Wind: West, Dora: Haku
A3.
2M is the correct answer. Think of this as 1223M → 123M + 2M. If you compare the individual tiles 2M 3P 7P, 2M will be the correct choice.
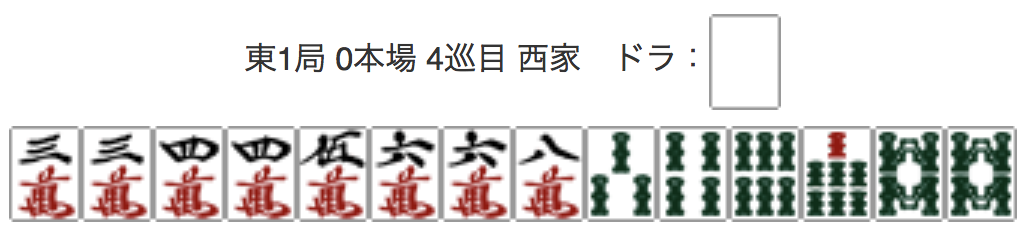
Q4.
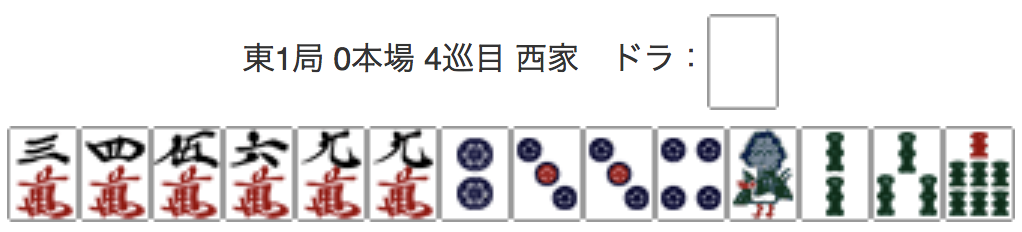
East 1, 0 Honba, 4th Turn, Seat Wind: West, Dora: Haku
A4.
7S is the correct answer. Continuing shapes like 3456 and 2334 are better compared to regular individual tiles. Discarding 7S will give you the widest wait and makes it the correct answer.
Q5.
East 1, 0 Honba, 4th Turn, Seat Wind: West, Dora: Haku
A5.
1M is the correct answer. This is a difficult complex wait and shape. Discarding 1M will give you an Ii-Shan-Ten for Pin-Fu, as well as a 258M discard will give you flexibility to Tan-Yao.
Q6.
East 1, 0 Honba, 4th Turn, Seat Wind: West, Dora: 3S
A6.
4P is the correct answer. Even if you discard the 4P, you are still able to utilize a 3P in any case your draw it, and you can also call Haku for a Pon-Ten (Pon to become Ten-Pai).
Q7.
East 1, 0 Honba, 4th Turn, Seat Wind: West, Dora: Haku
A7.
2M is the correct answer. The shape 2445M will still give you a 36M wait even if you discard 2M, so 2M is the correct choice.
Q8.
East 1, 0 Honba, 4th Turn, Seat Wind: West, Dora: Haku
A8.
8S is the correct answer as this is the least useful tile. 8M may look useless, but you can utilize it by drawing a 7M.
Q9.

East 1, 0 Honba, 4th Turn, Seat Wind: West, Dora: Haku
A9.
4S is the correct answer. Solidy one Jan-Tou/Pair/Atama with Pinzu/Circles or Souzu/Bamboo. 33467S shape will have 5S as an overlapping tile, so to solidify a Jan-Tou, discard 4S.
Q10.
East 1, 0 Honba, 4th Turn, Seat Wind: West, Dora: Haku
A10.
2S is the correct answer. Think of the 1223S shape as 123S + 2S. The most useless individual tile will be 2S so discard 2S.